Batch calling setup & usage
Work a list of Salesforce records from any list view: add the list view button once, build a batch, then dial through it with Call Next.
Batch calling dials a predefined list of Salesforce records in sequence, so no prospect or customer in the list is missed. You build the list from any Salesforce list view, then work through it from the Smart Panel. Set the list view button up once, and any user can build batches from it afterward.
Step 1: Create the “Create Batch Call List” button
To build batches from a list view, add a custom list view button once per object.
- Go to Setup → Object Manager → [Your Object] (for example, Lead or Contact).
- Click Buttons, Links, and Actions.
- Click New Button or Link.
- Fill in the details:
- Label: Create Batch Call List
- Display Type: List Button
- Behavior: Display in existing window with sidebar
- Content Source: URL
- URL Value:
/flow/dlfr__Batch_Call_List
- Click Save, then add the button to the object’s list view layout.
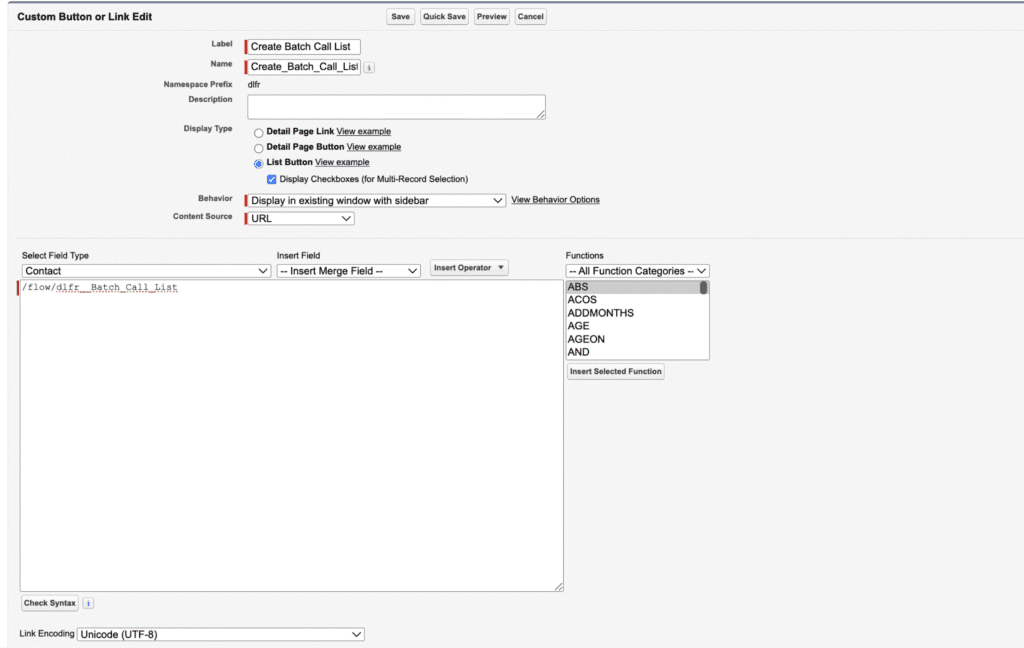
This button lets any user generate a batch call list from a list view of that object.
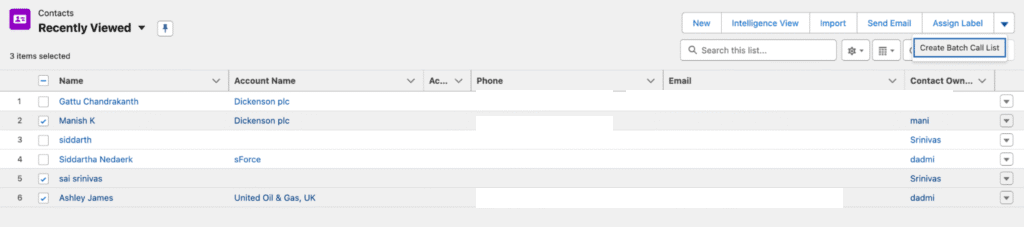
Step 2: Build a batch from a list view
- Open the list view of the object (for example, All Leads or My Contacts).
- Use filters to show only the records you want to call.
- Select the records to include.
- Click Create Batch Call List. A new page opens showing the number of selected records.
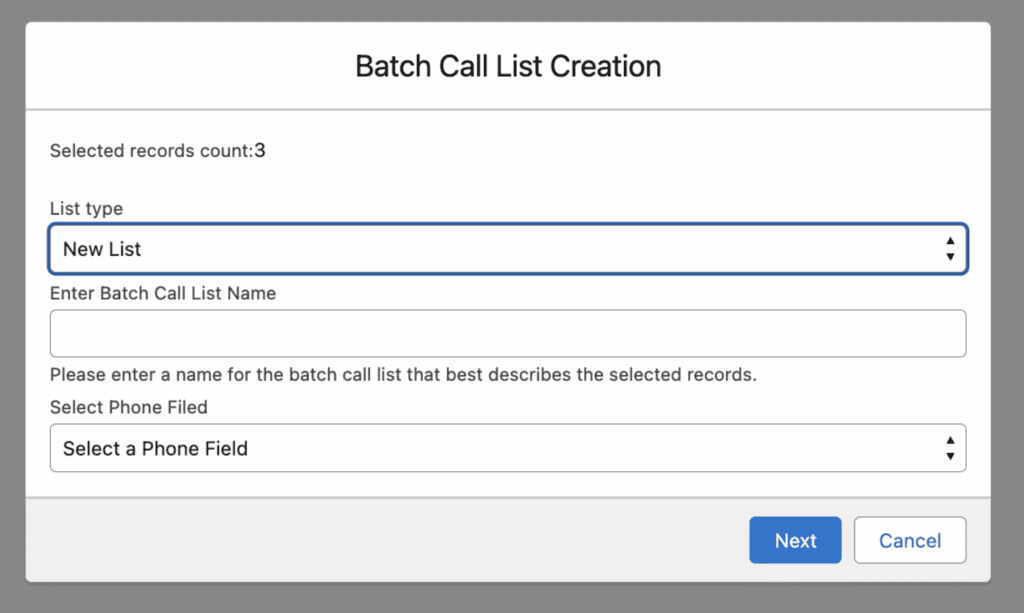
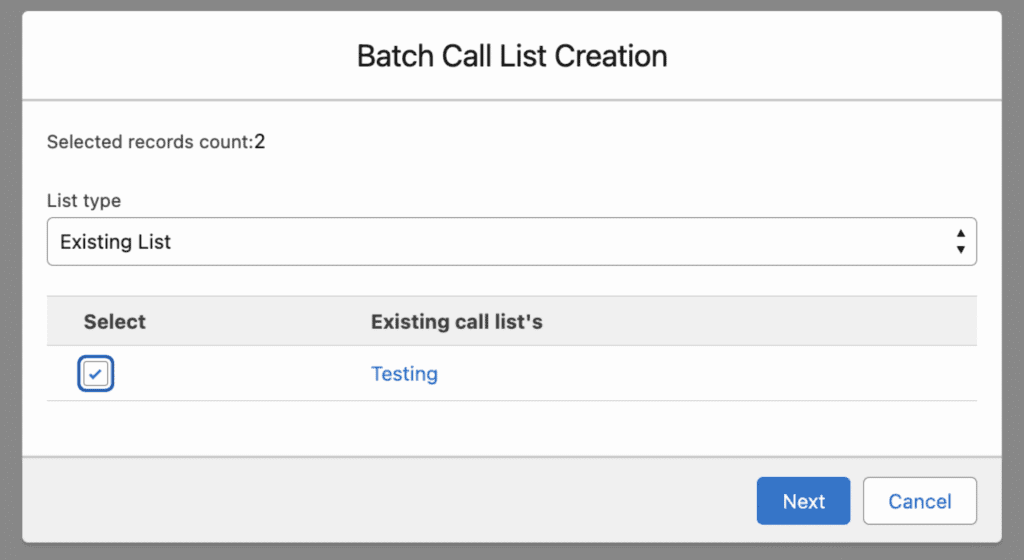
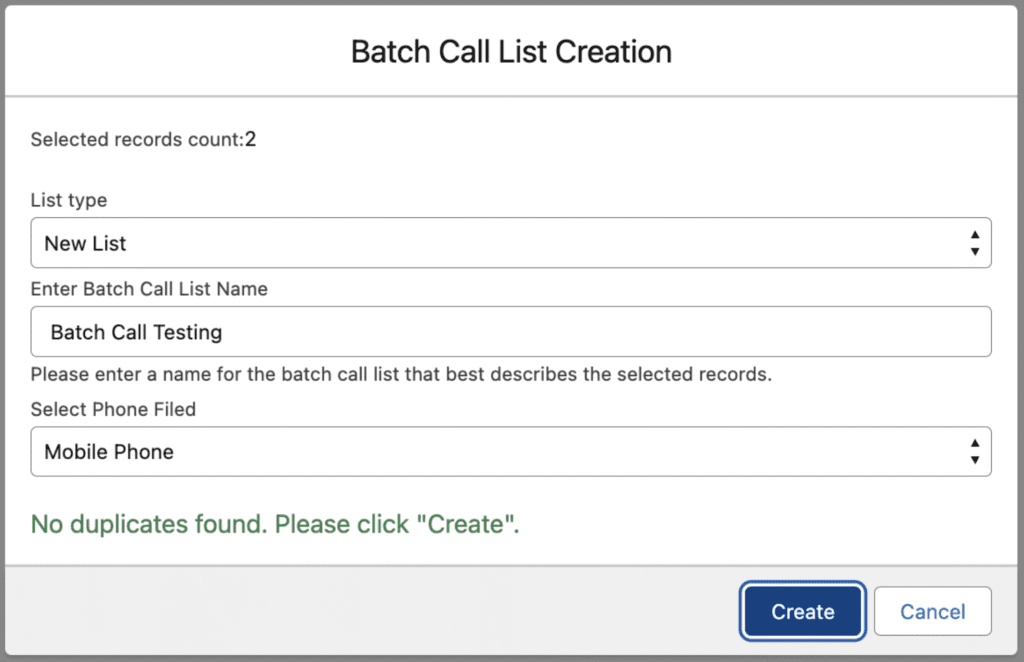
Step 3: Choose the batch list type
Add the selected records to an existing batch or start a new one.

Existing list
- Choose Existing List.
- Select the batch list to add the records to.
- Click Next.
New list
- Choose New List.
- Enter a Batch Name for easy identification.

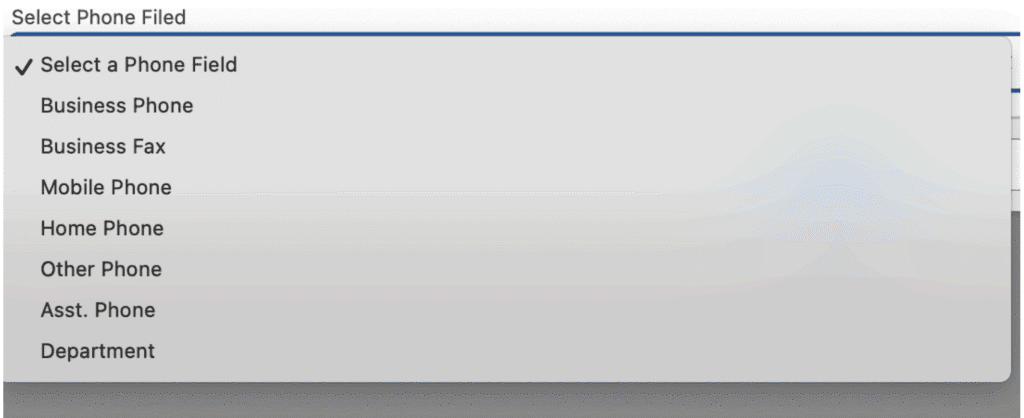
- Select the Phone Field to dial (for example, Phone or Mobile).
- Click Create.
The system checks for duplicate records before finalizing the batch.
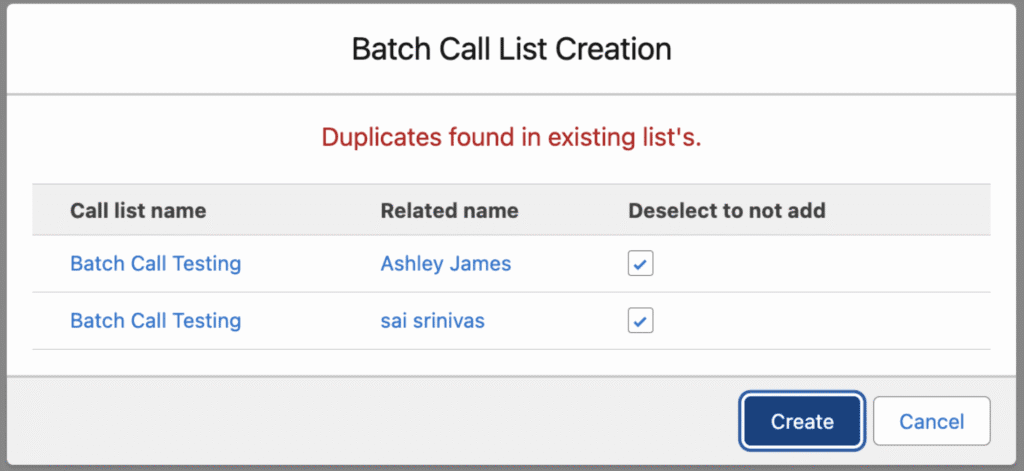
Step 4: Handle duplicate records
If any selected records already exist in another batch:
- The system lists the duplicate records.
- Review the list and select the ones you still want to include.
- Click Create again.
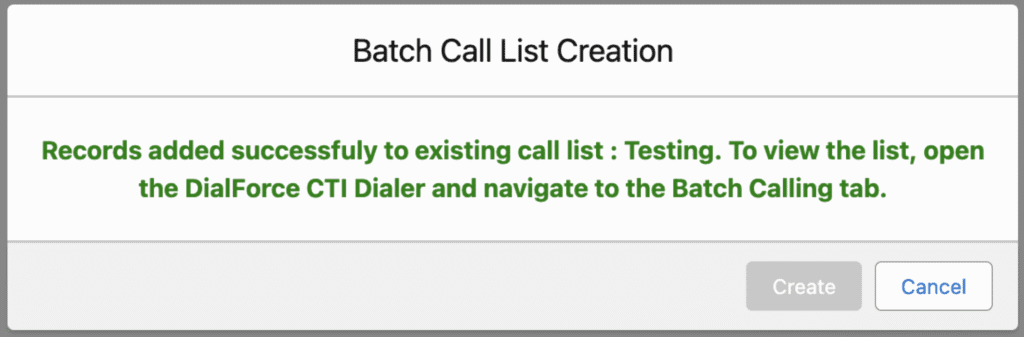
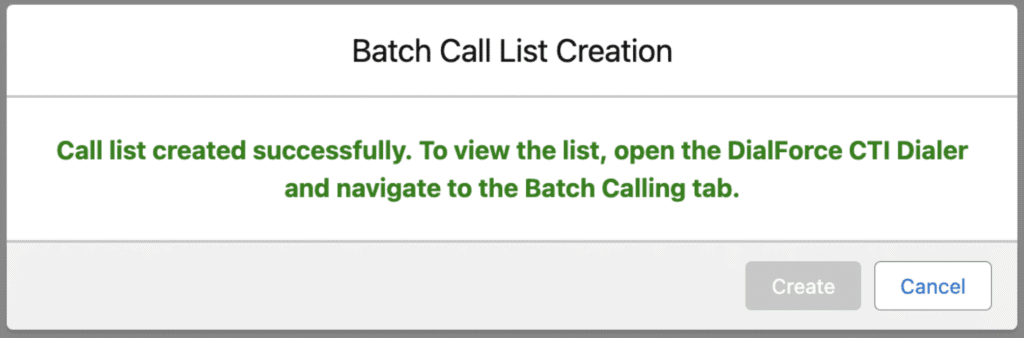
When the batch is created, a confirmation appears. Adding records to an existing list shows a message that the records were added to that list.
Creating a new list shows a message that the call list was created.
Step 5: Open the Batch Calling tab
- In the Salesforce Utility Bar, click the CTI (WorkDial) icon.
- Open the Batch Calling tab in the Smart Panel. All batch call lists in your org appear here.
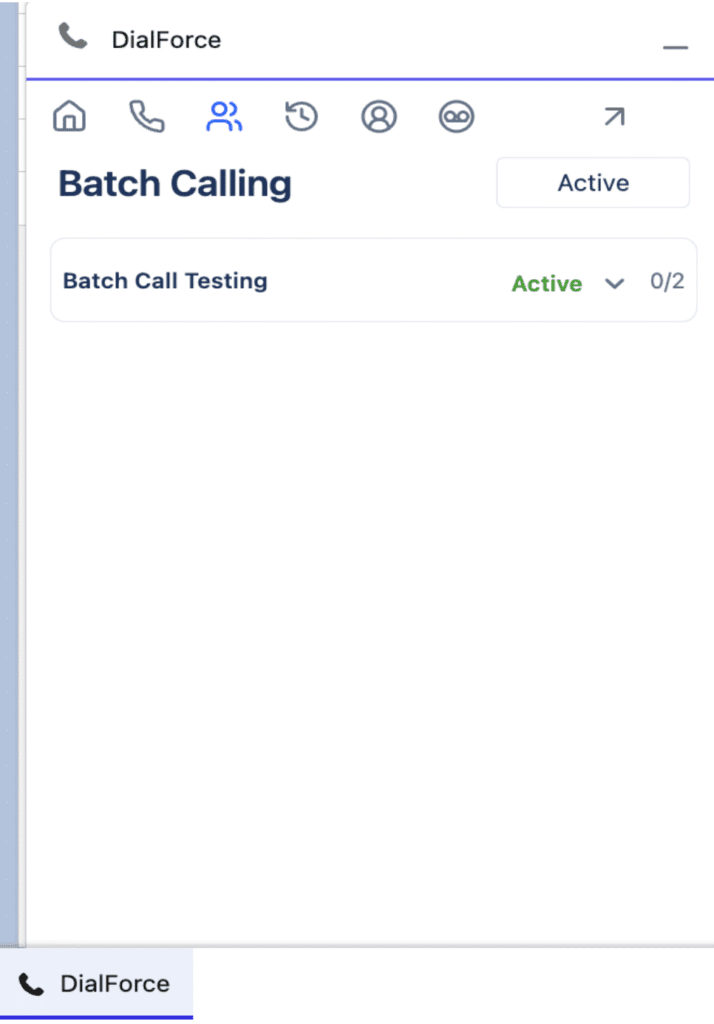
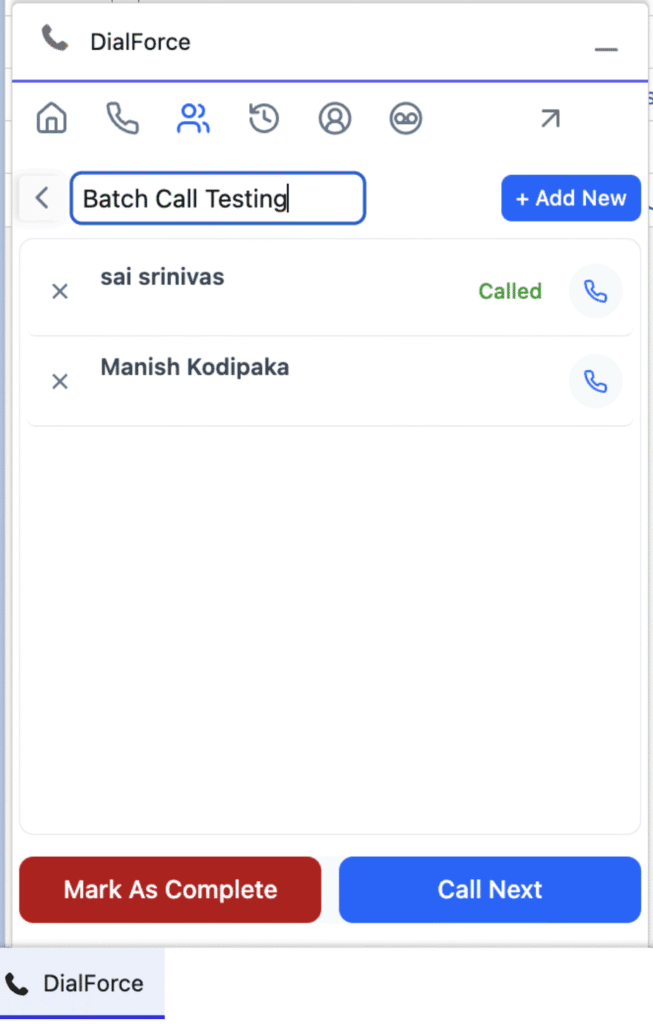
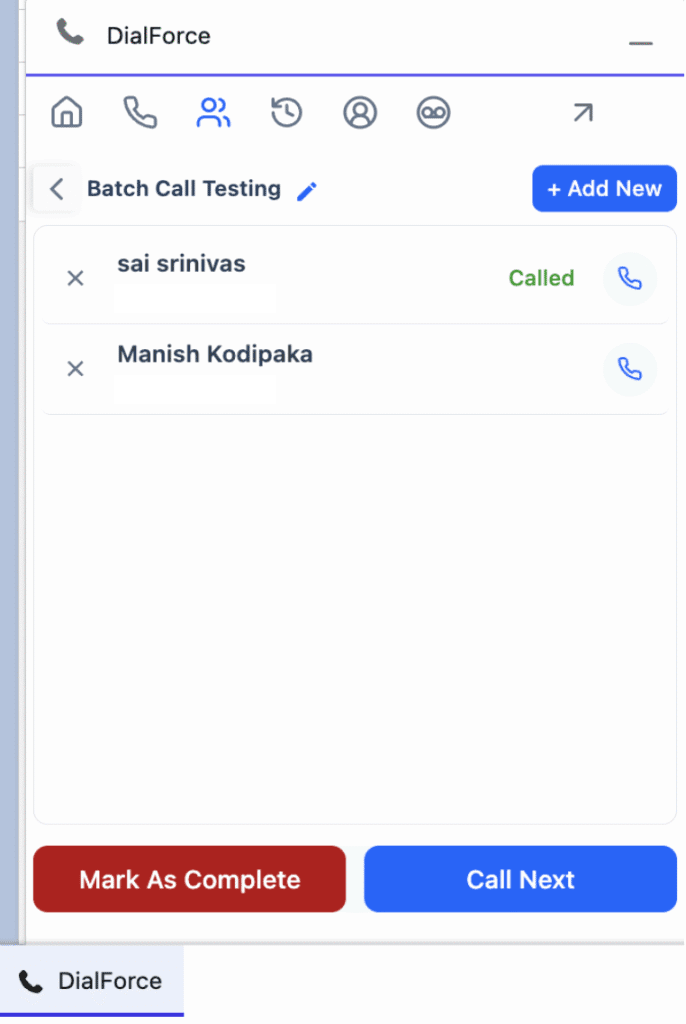
Step 6: Review and manage a batch
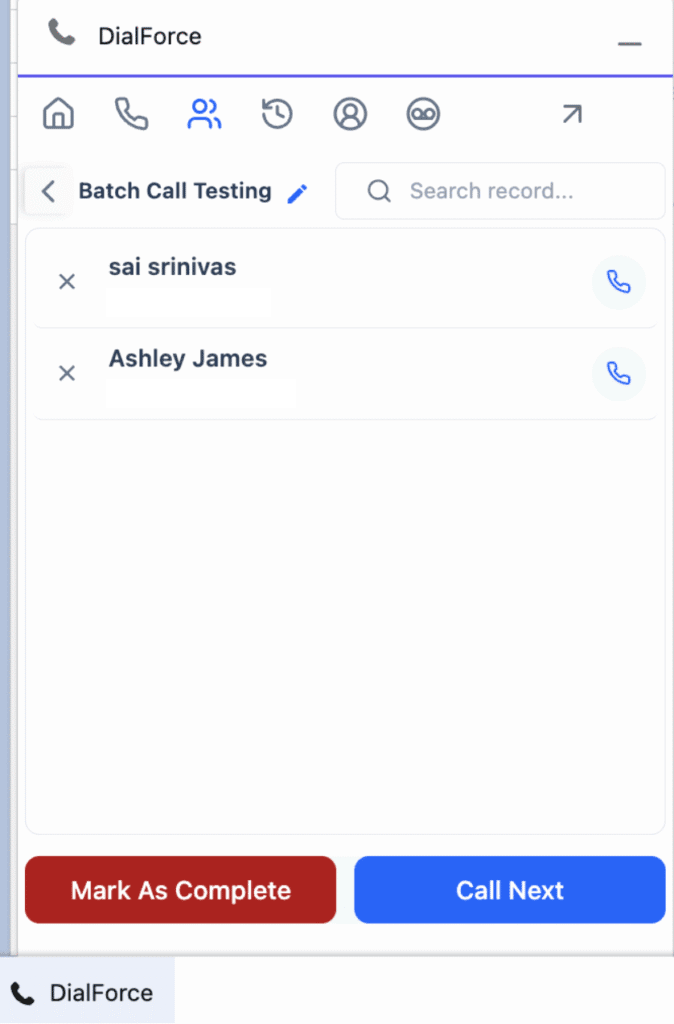
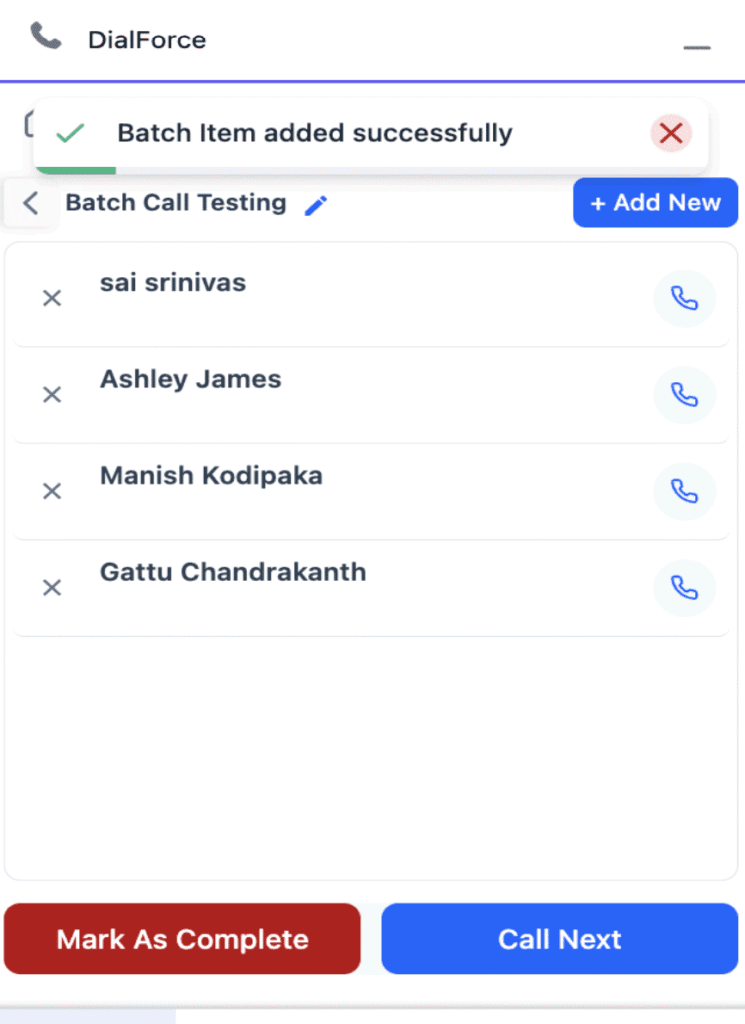
- Select a Batch from the list. The panel shows the Batch Name and the list of records to be called.
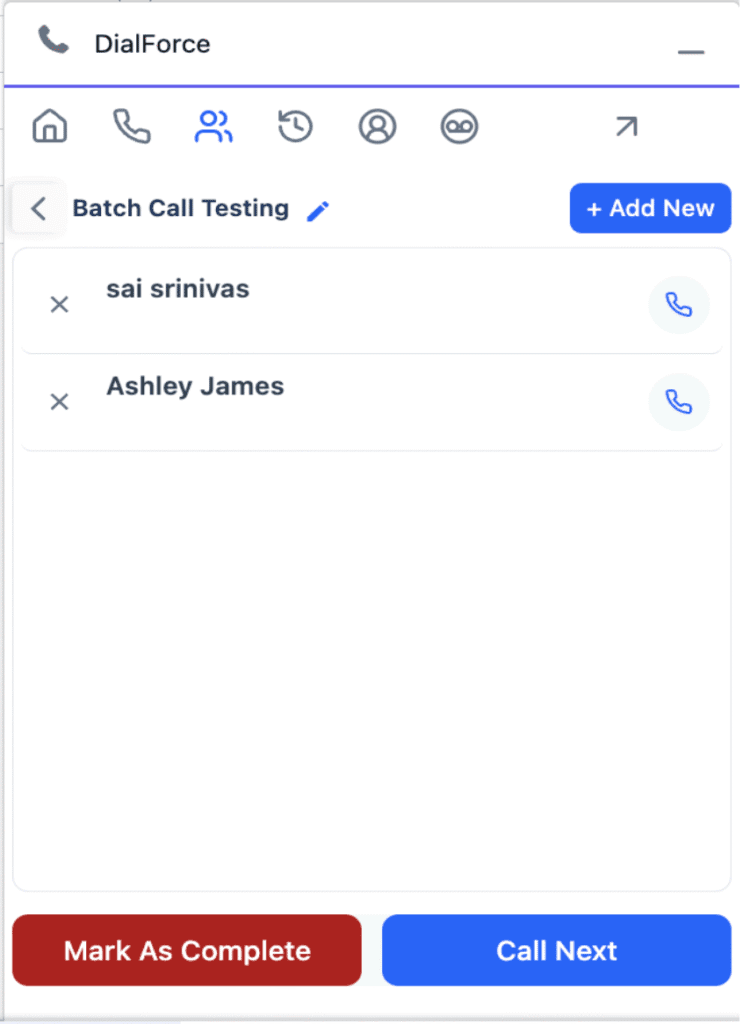
- Manage the batch:
- Rename it with the Edit (pencil) icon.
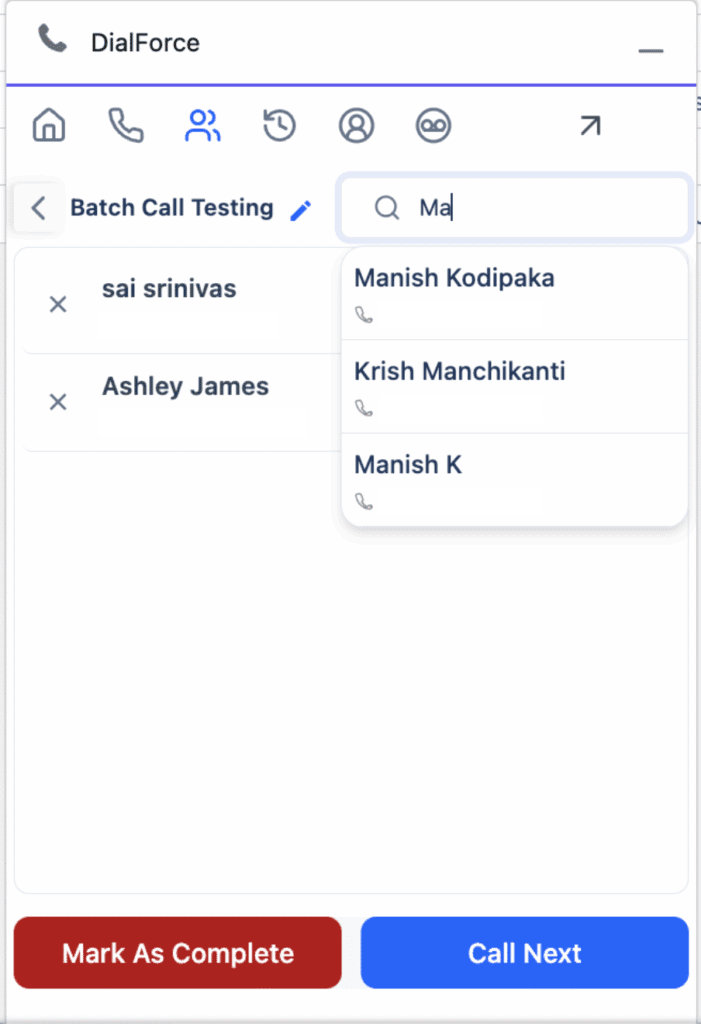
- Add a record: click Add New, search by name or keyword, and select it.
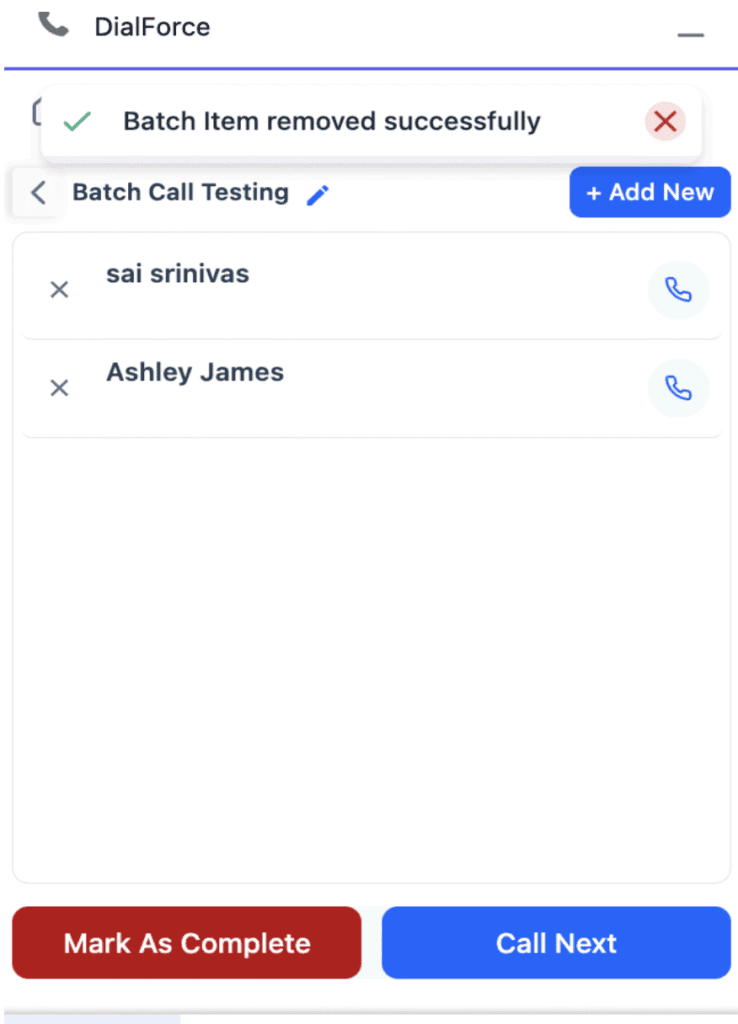
- Remove a record: click the X beside it.
- Reorder records if needed.
To rename the batch, click the pencil icon and type a new name in the editable field.
To add a record, click Add New, then type a name or keyword in the search box and select a result.
To remove a record, click the X beside it.
Step 7: Start batch calling
- Click Call Next to begin. WorkDial dials the first record in the list.
- After each call, enter wrap-up notes and a disposition, then click Call Next again to advance to the next record.
- Each call’s result is recorded automatically against the related Salesforce record, with a status such as Connected, Not Connected, or Customer Did Not Answer.
Step 8: Retry missed or unconnected calls
After working through the list, reopen the batch to review each record’s Call Status, then click Call Next again to redial the records shown as Not Connected or Customer Did Not Answer. Repeat until no uncalled or missed records remain.
Step 9: Mark the batch as complete
When all calls (including retries) are made, click Mark as Complete. The batch is closed, and all call activities and statuses are recorded in Salesforce for reporting and review.
Best practices
- Use Salesforce report and list view filters to build high-quality lists before creating a batch.
- Keep lists manageable (50 to 100 records) so agents stay focused.
- Train agents to use wrap-up time between calls so notes and dispositions stay accurate.
Troubleshooting
- Batch list not appearing: refresh the Smart Panel, or verify the batch was saved under the correct user.
- Duplicate records in the list: use Salesforce filters to remove duplicates before creating the batch.
- Calls not progressing: check agent availability status and verify the Twilio connection.