1. Steps to Configure Your Twilio Account in WorkDial #
Open WorkDial Setup
- Go back to Salesforce where you have installed WorkDial. From the App Launcher (9 dots on left side top in your salesforce), search for “WorkDial” App
Setup Call Center
- After switching the WorkDial app the default tab WorkDial Setup will be open and continue the steps as follows.
- You can open the Setup tab and complete the first three steps to begin configuring your gateway and number settings.
- Once completed, click the Finish tab. This is a one-time setup. After you click Finish, the tab will no longer appear and the gateway and other tabs will be unlocked.
- On the right side, you can also find a video with instructions for creating a call center. Simply follow the steps shown in the video.

Access Gateway Settings
- Click on Gateway from left menu on WorkDial setup Tab
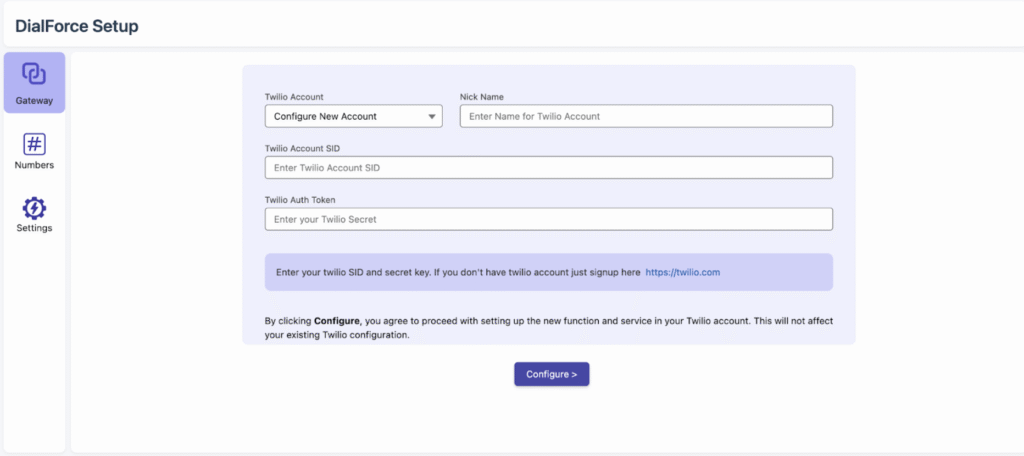
Configure Twilio Account
- Under Twilio Account, click Configure New Account.
- Fill in the following details:
- Nick Name: Enter any name (e.g., your Business or Department Name or Twilio Sub account name).
- Twilio Account SID: Paste your Twilio Account SID which was copied in the previous step.
- Twilio Auth Token: Paste your Twilio Auth Token which was copied in the previous step.
Click the Configure > button. WorkDial will automatically complete the setup in the background, just wait until it finishes. If the process fails, simply click the Retry button.
Step 2: Configure Twilio Number #
- Once the configuration is successful, you will see the numbers listed below. These are the numbers you purchased in Twilio in the previous steps. Select the number you would like to set up.
- Click on the Setup button to complete the configuration for the specific number.

Note: If you are using your existing Twilio account and it already has a number configured for another purpose or system, you will see the message below. When you click Setup, the old configurations will be erased. The WorkDial setup will only make changes to the numbers you select for setup, and existing numbers will remain untouched unless you explicitly configure them.
If you want to keep a separate environment for WorkDial, you can create a Twilio subaccount and use its Account SID and Auth Token to complete the WorkDial–Twilio setup connection. You can find more information about the sub account here – https://help.twilio.com/articles/360011348693-View-and-Create-New-Twilio-Subaccounts

Efficient number configuration is a cornerstone of WorkDial calling functionality within Salesforce. The Numbers tab offers several options to customize like country selection, access settings, business hours, busy messages & many more. This process takes 2 to 5 minutes.
- Country Configuration
This setting helps automatically append the country code prefix to phone numbers without altering the numbers stored in Salesforce records. If you select “All,” you must either choose the country each time or ensure that phone numbers already include the country prefix at the record level.
This setting does not limit you to call only one country’s number. You can still make calls to multiple countries.
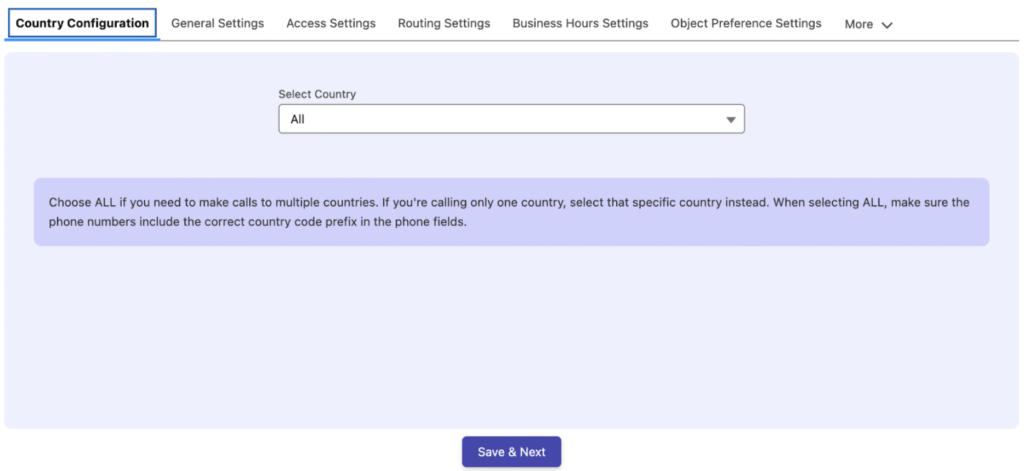
Choose “ALL” to enable calls to multiple countries, ensuring phone fields include the correct country code prefix (e.g., +1 for USA).
Alternatively, select a specific country (e.g., USA or Canada) for single-country operations to streamline call routing.
- General Settings
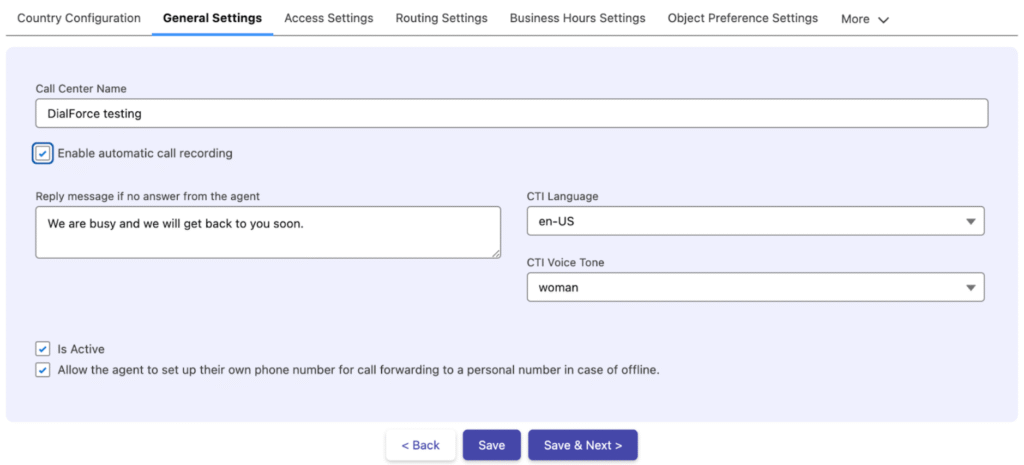
- Define the Call Center Name to identify the call center in reports and logs.
- Enable Automatic Call Recording by checking the box, automatically recording all calls for quality assurance.
- Set a Reply Message if No Answer by the Agent by typing a voice note (e.g., “We’re unable to connect you now; please leave a message”) in the message box and saving it.
- Select CTI Language and CTI Voice Tone to customize the voice message’s language and tone.
- Check Is Active to activate the assigned number for use.
- Enable Allow Agent to Set Up Call Forwarding to Personal Number for offline scenarios, forwarding calls to an agent’s personal phone.
- Access Settings
You can assign a number to each user or assign a single number to a queue. Calls will be routed based on this setup.
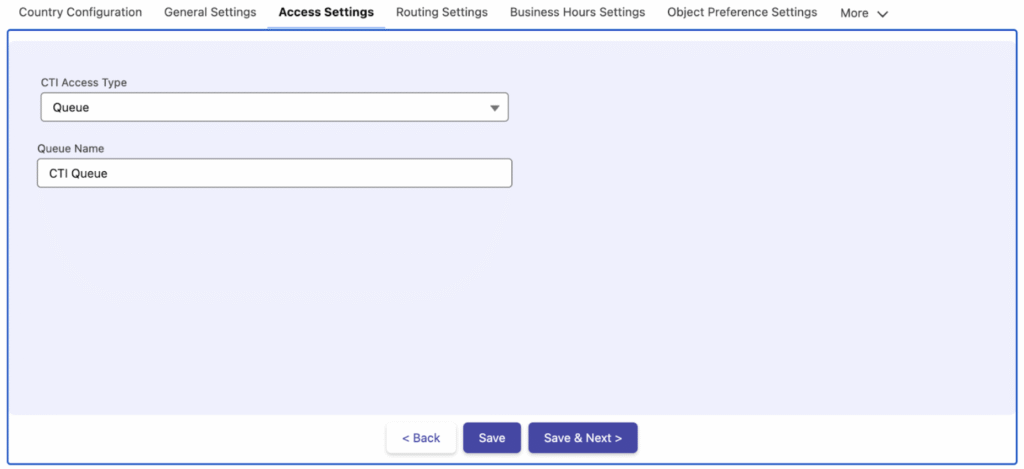
Choose CTI Access Type:
- User-Based: Assigns the number to a single user for exclusive use.
- Queue-Based: Allows multiple agents to use the same number (queue names configured backend). Learn how to create the queue in the salesforce https://help.salesforce.com/s/articleView?id=ind.fsc_create_and_configure_a_queue.htm&type=5
You can choose a Contact, Lead, or any other object while creating a queue. This selection does not affect the functionality.)
Note: Routing Settings are enabled only if Queue-Based is selected; they remain disabled for User-Based.
- Routing Settings (Enabled with Queue Based and this section is off if you choose user based access )
- In the case of queue routing, you can route calls based on the preference settings like below
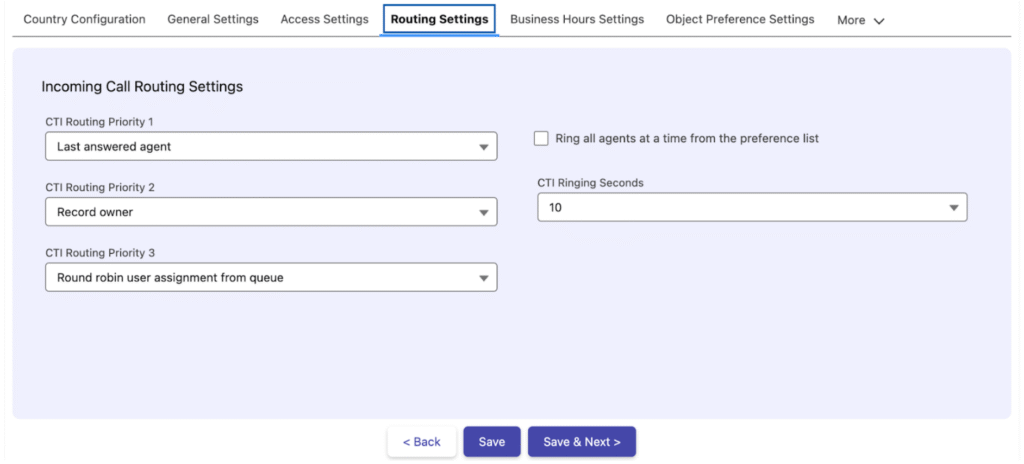
- Set CTI Routing Priority with three options (CTI Routing Priority 1, 2, 3) based on your needs.
- Enable Ring All Agents at a Time from the Preference List to contact all agents simultaneously, or leave it off for sequential ringing in the set order.
- Adjust CTI Ringing Seconds to define the ringing duration from available options.
Business Hour Settings
- Assign Business Hours to the Sender ID. To create business hours, go to Setup, enter “Business Hours” in the Quick Find box, select Business Hours, and click New Business Hours.
- For calls outside business hours, select a Business Action Type:
- Reply with Message: Enter a custom message (e.g., “We are not available at this moment”) in the CTI Business Hours Message section.
- Route to Other Call Center Number: Choose a number from the dropdown to redirect the call.
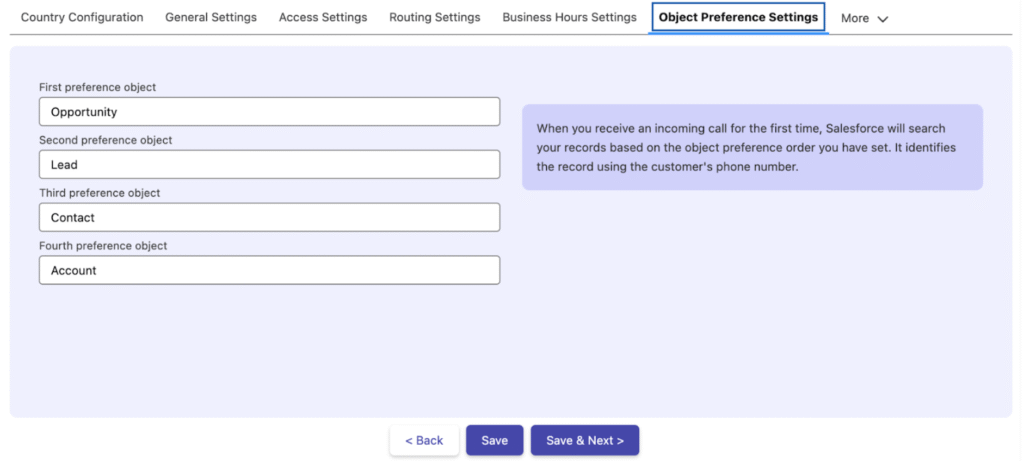
Object Preference Settings
This setting helps when receiving an incoming call for the first time, meaning there is no prior outbound record. In this case, the system will search your records by phone number in the order you define below. For example, if your first preference is Contact and your second is Lead, it will search the Contact records first, and if not found, it will then search the Lead records. You can configure up to four objects in this order.
✅ Next Step: Users assignment at the call center


